How to Cook with a Lodge Cast Iron Burger Press for Perfect Patties Every Time

By Lodgecastiron | Published: 2026-06-24
Category: How-to Guides
Learn how to use a cast iron burger press to make juicy, evenly cooked patties. Tips on seasoning, pressing technique, and pairing with Lodge cookware for the best burgers.
There's nothing quite like a homemade burger fresh off the grill or out of a cast iron skillet. But achieving that perfect, juicy patty with a beautiful crust and even thickness every single time can be tricky without the right tool. Enter the cast iron burger press — a simple yet game-changing accessory that helps you form consistent patties, lock in juices, and get that coveted sear. In this guide, we'll walk you through everything you need to know about using a cast iron burger press, from seasoning and technique to pairing it with the right cookware for flawless results.
Why Use a Cast Iron Burger Press?
A burber press, also known as a bacon press or steak weight, is a heavy, flat piece of cast iron designed to apply even pressure to food as it cooks. When used on burger patties, it serves several key purposes:
- Uniform thickness: Pressing the patty ensures it cooks evenly, preventing thin edges from burning while the center remains undercooked.
- Better sear: The weight maximizes surface contact with the hot cooking surface, creating a deep, caramelized crust that locks in flavor.
- Juicy interior: By pressing the patty quickly at the start of cooking, you seal in juices rather than letting them escape.
- Faster cooking: The added heat transfer from the press reduces overall cooking time.
Choosing the Right Cookware for Your Burger Press
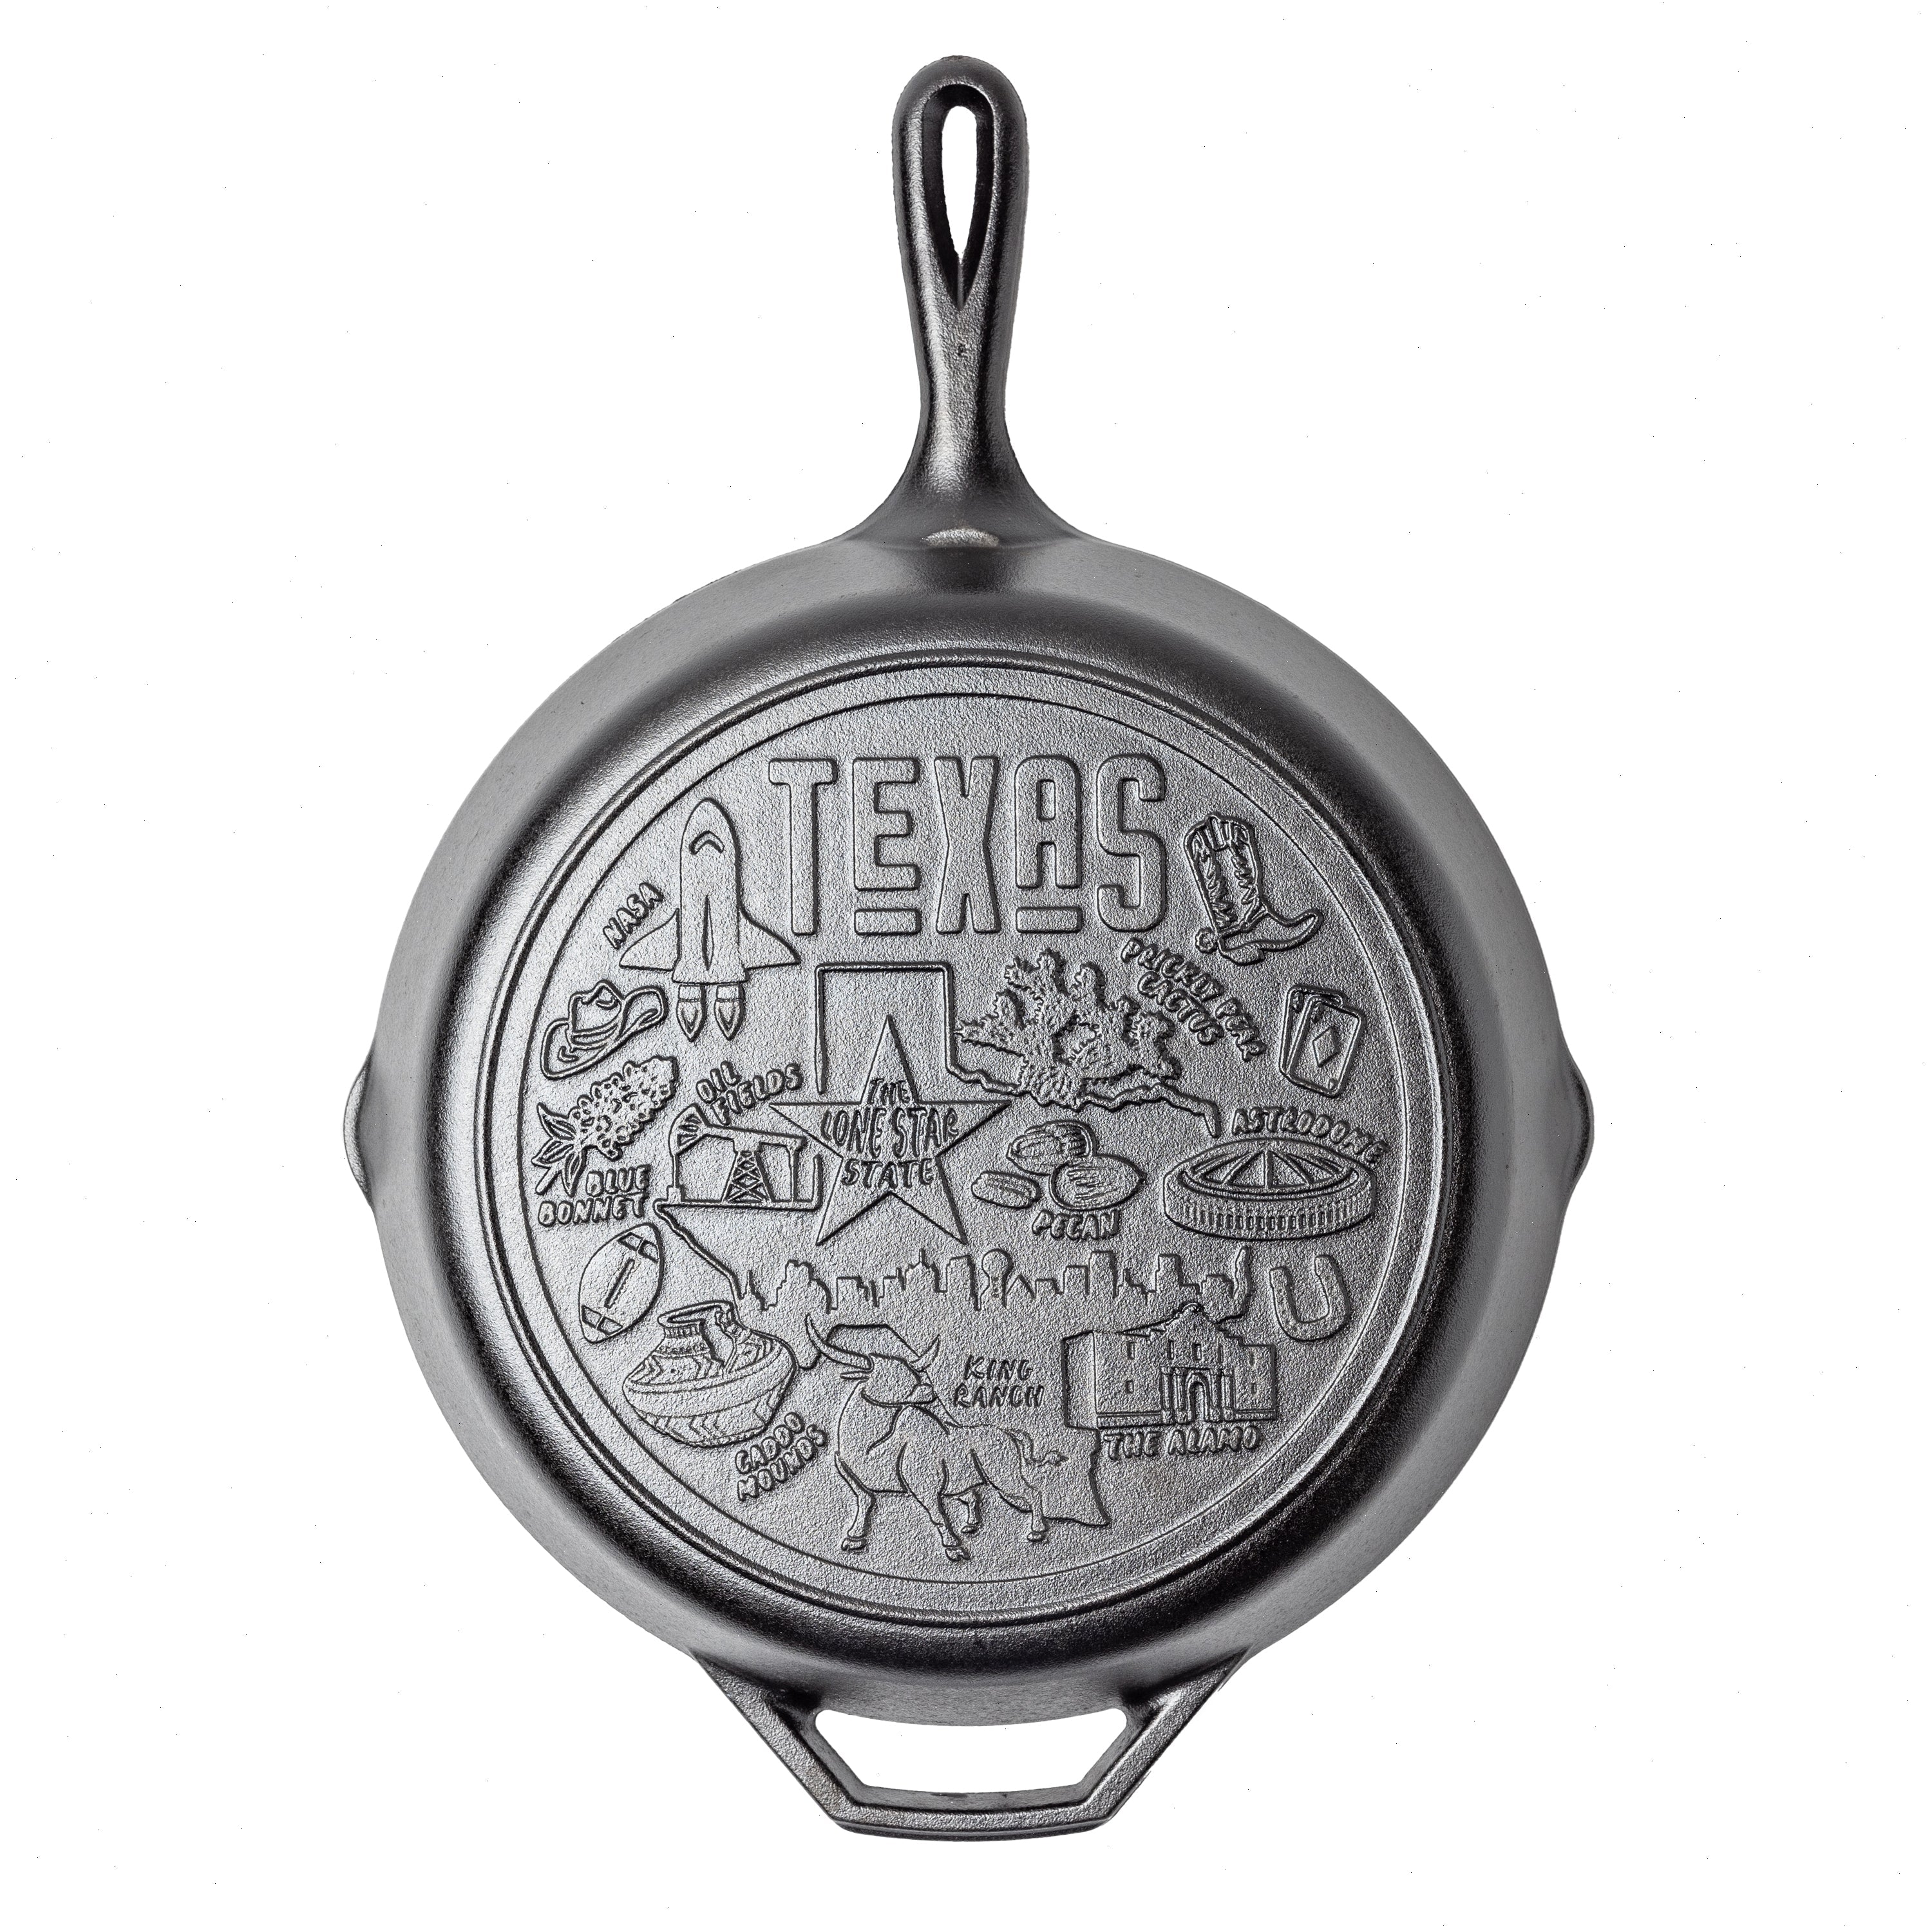
To get the most out of your burger press, you need a sturdy, heat-retaining cooking surface. Cast iron skillets, griddles, and flat-top grills are ideal. For example, using a American Road Trip: 12 Inch Seasoned Cast Iron Skillet, Texas provides ample space and even heat for cooking multiple patties at once. Alternatively, a carbon steel pan heats up quickly and offers a non-stick surface when properly seasoned — consider the Carbon Steel Set for a versatile collection that pairs perfectly with a burger press.

Step-by-Step Guide: How to Use a Cast Iron Burger Press
Step 1: Preheat Your Cooking Surface
Place your cast iron skillet or griddle over medium-high heat for at least 5 minutes. Cast iron retains heat exceptionally well, so preheating is crucial for a good sear. If you're using a grill, let the grates get hot before placing the patties.
Step 2: Prepare Your Patty
Start with ground beef that has at least 20% fat content for juiciness. Divide the meat into equal portions (about 6 ounces per patty is a good size). Gently shape the meat into a ball — avoid overworking it, as that can make the burger tough.
Step 3: Season Generously
Just before cooking, season the outside of the patty with salt and pepper. You can also add garlic powder, onion powder, or your favorite burger seasoning. The press will help the seasoning adhere and penetrate the meat.
Step 4: Press and Sear
Place the patty on the hot surface and immediately set the burger press on top. Apply firm, even pressure for about 30 seconds. This flattens the patty to a uniform thickness (about 3/4 inch) and starts the searing process. After 30 seconds, remove the press and let the patty cook for another 2-3 minutes on the first side.
Step 5: Flip and Finish
Flip the patty with a spatula. You can press it again lightly for another 15 seconds if you want a thinner patty, but avoid pressing too much after the first flip, as that can squeeze out juices. Cook for another 2-3 minutes for medium doneness (internal temperature of 160°F). Add cheese during the last minute of cooking.
Step 6: Rest and Serve
Let the patties rest for 2-3 minutes before serving. This allows the juices to redistribute, ensuring a moist burger.
Tips for Perfect Burgers Every Time
- Don't over-press: Pressing multiple times or too hard can dry out the patty. One good press at the beginning is usually enough.
- Use a hot press: Place the press on the cooking surface for a minute before using it on the patty. A hot press helps sear the top of the burger simultaneously.
- Keep it clean: After each use, wipe the press clean with a paper towel while it's still warm. For stubborn residue, scrub with a non-abrasive brush and mild soap, then dry and oil lightly.
- Experiment with thickness: For smash-style burgers, press the patty flat until it's about 1/4 inch thick. For classic pub burgers, aim for 3/4 to 1 inch.
Cleaning and Caring for Your Cast Iron Burger Press
Like any cast iron tool, your burger press requires proper care to maintain its seasoning and prevent rust. Here's how to keep it in top shape:
- Clean while warm: After cooking, rinse the press with hot water and scrub with a stiff brush. Avoid using soap if possible, but a small amount is okay if needed.
- Dry thoroughly: Place the press back on the stove over low heat to evaporate all moisture.
- Re-season lightly: Rub a thin layer of vegetable oil or flaxseed oil over the surface and heat until it smokes. Let it cool, then store.
- Store in a dry place: Keep the press in a low-humidity area, preferably with a paper towel between it and other cookware to prevent scratches.
Pairing Your Burger Press with Other Lodge Accessories
To elevate your burger-making experience, consider adding a few complementary accessories. For instance, Silicone Bakeware Grips protect your hands when handling hot handles or the press itself. If you're cooking indoors, a 10 Ounce Rectangular Walnut Wood Underliner makes a beautiful and functional trivet for serving sizzling patties straight from the skillet to the table. And for camping or outdoor cooking, the Cast Iron Boy Scout Camp Dutch Oven can be used as a makeshift press for large batches or to keep patties warm over coals.
Frequently Asked Questions About Cast Iron Burger Presses
Can I use a burger press on a non-stick pan?
It's not recommended. Cast iron presses are heavy and can scratch non-stick coatings. Stick to cast iron, carbon steel, or stainless steel surfaces.
Do I need to season my burger press?
Yes, most cast iron presses come pre-seasoned, but you should maintain the seasoning with regular oiling after cleaning. This prevents rust and creates a non-stick surface.
Can I use the press for other foods?
Absolutely! Use it to press bacon, grilled cheese sandwiches, panini, tortillas, or even tofu for a crispy exterior. It's a versatile tool for any kitchen.
Final Thoughts: Master the Art of the Perfect Burger
A cast iron burger press is a small investment that delivers big returns in your cooking. With consistent pressure, you'll get restaurant-quality patties at home — juicy on the inside, crispy on the outside. Pair it with quality Lodge cookware and accessories, and you'll wonder how you ever made burgers without one. Ready to upgrade your burger game? Explore the American Road Trip: 12 Inch Seasoned Cast Iron Skillet, Texas for a skillet that's perfect for pressing multiple patties at once. Happy cooking!