How to Bake Sourdough Bread in a Cast Iron Combo Cooker: A Step-by-Step Guide
By Lodgecastiron | Published: 2026-06-08
Category: How-to Guides
Learn to bake artisan sourdough bread at home using a cast iron combo cooker. This step-by-step guide covers dough preparation, scoring, and baking tips for a crispy crust and soft crumb.
There's nothing quite like the aroma of freshly baked sourdough bread filling your kitchen. Achieving that bakery-quality crust—crackling, golden, and perfectly crisp—often requires steam and intense, even heat. The secret weapon for home bakers? A cast iron combo cooker. Unlike a standard Dutch oven, a combo cooker features a deep skillet base and a shallow, domed lid that doubles as a second cooking surface. This design makes loading and scoring your dough effortless while trapping steam for a professional finish.
In this guide, you'll learn exactly how to bake sourdough bread in a cast iron combo cooker, from starter maintenance to the moment you pull that gorgeous loaf from the oven. We'll cover essential tools, step-by-step methods, and pro tips to help you succeed on your first try—and every time after.
Why Use a Cast Iron Combo Cooker for Sourdough?
A cast iron combo cooker offers several advantages over a traditional round Dutch oven for bread baking. The shallow lid becomes your base for the loaf, making it far easier to slide in parchment paper or a shaped boule without burning your fingers. The deep skillet acts as the top, which traps steam and radiates heat evenly.
The heavy cast iron construction ensures superb heat retention, creating the intense oven spring that gives sourdough its airy crumb. Plus, the preheated combo cooker mimics the steam-injected ovens used by artisan bakers. If you're serious about baking bread at home, a combo cooker is a versatile investment—you can also use the skillet side for searing meats or roasting vegetables.
Essential Tools and Ingredients
Before you begin, gather the following items to streamline your baking session:
- Active sourdough starter (fed 6–12 hours prior and passing the float test)
- Bread flour (or a blend of all-purpose and whole wheat for flavor)
- Water (filtered, room temperature)
- Salt (fine sea salt or kosher)
- Cast iron combo cooker (10-inch or 12-inch, such as those in the Classic Collection)
- Parchment paper or Parchment Dutch Oven Liners for easy transfer
- Bench scraper and lame or sharp knife for scoring
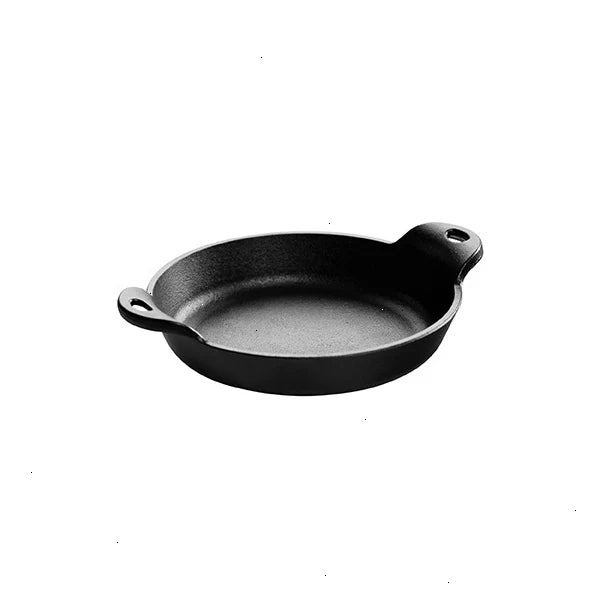
If you don't already own a combo cooker, consider pairing it with a 10.25 Inch Seasoned Cast Iron Baker's Skillet—its wide cooking surface works beautifully for free-form loaves or smaller batards.
Step 1: Prepare Your Sourdough Starter
A healthy, active starter is the heart of great sourdough. Feed your starter with equal parts flour and water (by weight) about 8–12 hours before mixing your dough. Look for signs of peak activity: a bubbly, doubled volume, and a dome that's just starting to flatten. To test, drop a spoonful of starter into a glass of water—if it floats, it's ready.
For a standard loaf (about 900g dough), you'll need 100g of active starter. If your starter isn't vigorous, your bread may turn out dense or fail to rise. Keep your starter at room temperature (70–75°F) for optimal fermentation.
Step 2: Mix and Autolyse the Dough
In a large bowl, combine 400g bread flour, 100g whole wheat flour (optional), and 350g water. Mix until no dry flour remains. Cover and let rest for 30–60 minutes. This autolyse step hydrates the flour and begins gluten development naturally, resulting in a more extensible dough.
After resting, add 100g of active starter and 10g of salt. Wet your hands and fold the dough over itself a few times to incorporate the starter and salt evenly. Cover and let rest 30 minutes.
Step 3: Perform a Series of Stretch and Folds
Over the next 2–3 hours, perform 4 sets of stretch and folds every 30 minutes. To do this, grab one side of the dough, stretch it upward, and fold it over the center. Rotate the bowl a quarter turn and repeat. This builds strength without degassing the dough.
After the final fold, let the dough bulk ferment at room temperature (70–75°F) until it has increased by 50–75% and shows small bubbles on the surface. This typically takes 4–6 hours, depending on your starter activity and room temperature.
Step 4: Shape the Dough
Lightly flour your work surface. Gently turn the dough out and divide if making two smaller loaves. Use a bench scraper to shape the dough into a tight boule: fold the bottom up, then the left and right sides into the center, then roll from the top down. Pinch the seam to seal.
Place the shaped dough seam-side up into a floured banneton or a bowl lined with a floured kitchen towel. Cover and refrigerate overnight (8–16 hours) for a cold proof. Cold proofing deepens flavor and makes scoring easier.
Step 5: Preheat Your Combo Cooker
About 45 minutes before baking, place your cast iron combo cooker (both the skillet base and the domed lid) into the cold oven. Preheat the oven to 500°F (260°C). The combo cooker needs to become blisteringly hot to generate the steam and oven spring you're after.
While the cooker preheats, remove your dough from the refrigerator and let it sit at room temperature for 20–30 minutes. Use this time to prepare a piece of parchment paper big enough to lift the dough easily.
Step 6: Score and Load the Dough
Carefully remove the hot combo cooker from the oven and set the lid aside (it will be extremely hot—use thick oven mitts). Place the parchment paper onto the shallow skillet base. Gently invert the dough onto the parchment so the seam side is down. If it sticks, use a bench scraper to release it.
With a sharp lame or knife, score the dough with a single deep slash (about ½ inch deep) at a 45-degree angle. This creates an ear and controls where the bread expands. For a decorative touch, you can add a few smaller slashes.
Lift the parchment paper by the corners and lower the dough into the hot skillet base. Cover immediately with the domed lid.
Step 7: Bake with Steam
Place the covered combo cooker back into the oven and reduce the temperature to 450°F (230°C). Bake for 20–25 minutes with the lid on. The trapped moisture creates steam, which keeps the crust soft and allows maximum oven spring.
After the covered bake, carefully remove the lid (beware of steam). Continue baking for another 15–20 minutes until the crust is deep golden brown and the internal temperature reaches 200–210°F (93–99°C). If the crust is browning too quickly, tent the loaf loosely with foil.
Step 8: Cool Completely
Transfer the baked loaf to a wire rack. Resist the urge to slice for at least 1–2 hours. As the bread cools, the crumb sets and the crust continues to crisp. Cutting too early will result in a gummy, dense interior.
Once completely cool, store your sourdough in a paper bag or bread box at room temperature. Avoid plastic—it softens the crust.
Pro Tips for Perfect Sourdough Every Time
- Invest in good liners: Using Parchment Dutch Oven Liners eliminates sticking and cleanup—just lift and bake.
- Manage steam: If you notice the dough isn't rising well in the first 20 minutes, your combo cooker might not be hot enough. Always preheat for at least 45 minutes.
- Experiment with hydration: Sourdough prefers higher hydration (70–80%). If your dough feels too sticky, reduce water slightly next time.
- Use a baking stone or steel: Place your combo cooker on a preheated baking stone to boost bottom heat for a crispier crust.
- Don't skip the cold proof: A long, cold fermentation improves flavor and makes scoring much easier.
Why Lodge Cast Iron?
Lodge has been crafting cast iron cookware since 1896, and their combo cookers are designed with the home baker in mind. The thick, even walls distribute heat flawlessly, and the pre-seasoned surface is ready to use right out of the box. Whether you choose a classic model or explore the Essential Enamel Dutch Oven for colorful, non-reactive baking, Lodge cookware delivers dependable performance loaf after loaf.
Beyond bread, a combo cooker's versatile design excels at braising meats, roasting vegetables, and even frying chicken. It's a true multi-tasker that deserves a permanent spot on your stovetop.
Troubleshooting Common Issues
| Problem | Cause | Solution |
|---|---|---|
| Dense, flat loaf | Under-proofed or weak starter | Extend bulk fermentation; ensure starter passes float test |
| Burnt bottom crust | Oven too hot or combo cooker too close to heat source | Place a baking sheet under the cooker; reduce temp by 25°F |
| No oven spring | Not enough steam; dough dried out | Bake with lid on for full 25 minutes; spray water inside before covering |
| Blowouts or cracks | Score too shallow or at wrong angle | Score ½ inch deep at 45°; use a sharp lame |
Conclusion
Baking sourdough bread at home doesn't require a professional bakery setup. With a quality cast iron combo cooker and a little patience, you can produce loaves that rival any artisan bakery. The key lies in proper preheating, steam management, and respecting the fermentation process. Once you master these steps, you'll never go back to store-bought bread.
Ready to start your sourdough journey? Explore the 10.25 Inch Seasoned Cast Iron Baker's Skillet—it's the perfect size for baking single loaves and pairs beautifully with your combo cooker for endless bread-baking possibilities.