Why corners and grooves are the hardest part to clean
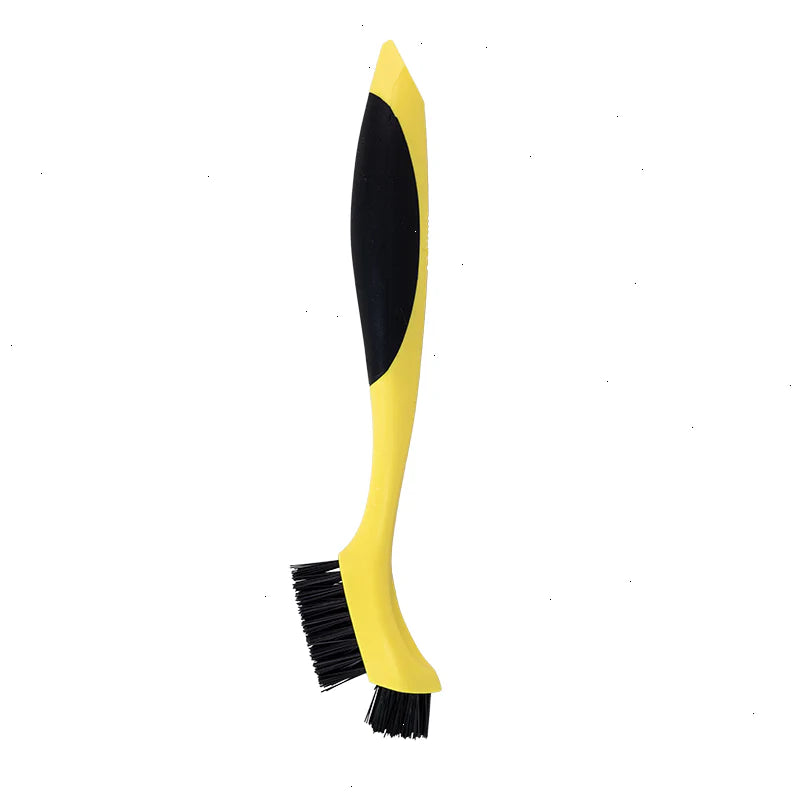
Cast iron cookware with ridges, wedge sections, loaf pan corners, or grill ribs gives food plenty of places to hide. A standard sponge or scraper often glides over the surface but leaves cooked-on bits tucked into the tightest spots. The Corner & Groove Brush is designed for exactly those areas: it has two narrow brush heads for tight-space cleaning and a pointed handle for scraping.
This guide walks through how to use the brush effectively, where it fits in your cast iron cleaning routine, and what the catalog does and does not tell you about care.
What the Corner & Groove Brush is built for
- Corner & Groove Brush: Two narrow brush heads made for tight-space cleaning, plus a pointed handle for scraping. These are the features that let you reach corners, grooves, and between grill ribs where a flat sponge cannot.

Corner & Groove Brush - Corner & Groove Brush: Made of molded plastic, with a no-slip silicone grip to reach every corner easily. The plastic body and silicone grip affect how you hold and care for the brush, and they set practical limits on heat exposure.
- Corner & Groove Brush: Perfect for pans with ridges, wedge pans, loaf pans, grilling pans, and all your favorite cast iron cookware. This tells you which pieces in your kitchen will benefit most from the brush's narrow heads.
How to clean cast iron crevices with the brush
Use this sequence after cooking, once the pan is cool enough to handle safely. The brush is designed to remove cooked-on food from corners, grooves, and between grill ribs; the steps below put that design to work without guessing at temperatures or products.
- Let the pan cool slightly: Cast iron holds heat. Wait until the pan is warm but not scorching before cleaning, and never plunge a hot pan into cold water.
- Loosen surface residue first: If there is loose food or excess oil, wipe or rinse it away so the brush heads can focus on the stuck-on bits in corners and grooves.
- Work the narrow heads into the tight spots: Use the two narrow brush heads along ridges, inside wedge pan corners, around loaf pan edges, and between grill ribs. Short, targeted strokes in the groove are more effective than scrubbing the whole pan randomly.
- Use the pointed handle for stubborn spots: The pointed handle is made for scraping. Use it gently on cooked-on food in corners, then follow with the brush heads to lift the loosened residue.
- Rinse and dry the pan promptly: After cleaning, rinse the pan and dry it thoroughly. The brush helps remove food; drying is still your job to protect the seasoning.
- Rinse and dry the brush: The catalog does not give specific brush care instructions beyond the silicone grip and molded plastic construction. A sensible default is to rinse the brush after use and let it air dry, but check the product packaging for any additional guidance.
Where the brush helps most in a cast iron kitchen
The Corner & Groove Brush is most useful on pieces with built-in crevices: ridged pans, wedge pans, loaf pans, and grilling pans. On a smooth skillet, a standard scraper or sponge may be enough for the flat cooking surface, but the brush still earns its place along the inside edge where the wall meets the base.
For grill pan cleaning specifically, the narrow heads can get between the ribs where baked-on food tends to collect. Use the pointed handle to loosen anything wedged at the base of a rib, then brush along the channel.
What the catalog does not tell you about brush care
The supplied product information confirms the molded plastic body and no-slip silicone grip, but it does not list a maximum temperature, dishwasher suitability, or replacement schedule. Avoid placing the brush in situations that could exceed the plastic's tolerance, such as direct contact with a screaming-hot pan or open flame. If you need definitive care instructions, check the packaging or the manufacturer's guidance for this specific brush.
This is not a negative mark against the brush; it simply means you should treat it as a hand-cleaning tool and use common sense about heat and storage.
Brush vs. scraper vs. sponge for cast iron corners
Different tools solve different problems. Here is how the Corner & Groove Brush compares for the tight spots this article covers.
- Corner & Groove Brush: Best for targeted cleaning in corners, grooves, and between grill ribs. The two narrow heads and pointed handle are designed for these areas. Not confirmed for high-heat or dishwasher use.
- Flat scraper: Good for broad, flat surfaces and loosening large stuck-on patches. Less effective inside narrow grooves and corners where the blade cannot reach.
- Sponge or cloth: Useful for wiping and general washing, but it tends to glide over tight crevices and can leave food behind in ridged pans.
A realistic routine for cast iron grill pan cleaning
After cooking on a grill pan, let it cool to a safe handling temperature. Scrape the flat areas with a spatula or scraper, then switch to the Corner & Groove Brush for the ribs. Work the narrow head along each channel, using the pointed handle on any hardened bits at the base of the ribs. Rinse, dry thoroughly, and apply a thin layer of oil if your normal seasoning routine calls for it.
The brush is a cleaning aid, not a substitute for seasoning and drying. It helps you reach the places that cause sticking and uneven surfaces over time.

